
Tabla de Contenidos
- What Advanced Pattern Cutting Automation Does for Your Factory
- Understanding CAD Pattern Cutting Software and Digital Workflows
- Selecting and Setting Up Automated Fabric Cutting Machines
- Implementing Fabric Nesting Software to Reduce Waste
- Building Your Automated Cutting Room Workflow
- Measuring ROI and Operational Performance
- Training Your Team and Managing the Transition
- Common Implementation Mistakes to Avoid
- Preguntas Frecuentes
Last Updated: October 9, 2026
What Advanced Pattern Cutting Automation Does for Your Factory
Advanced pattern cutting automation transforms how garments and sewn products move from design to production. Instead of manual cutting or basic machinery, your factory gets precision equipment that reads digital patterns and cuts fabric with repeatable accuracy. This is pattern cutting automation at scale.
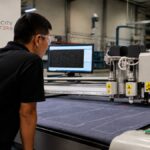
The core benefit is clear: less waste, faster throughput, fewer errors. A cutting room that once needed six people cutting by hand can now handle the same volume with two operators managing automated systems. The machines don’t get tired. They don’t make mistakes based on distraction or fatigue.
But here’s what matters most: pattern cutting automation isn’t just about speed. It’s about consistency. Every piece cut is identical to the last. That matters when you’re shipping 10,000 units to a retailer who expects zero variation.
At Velocity Plotters, we’ve worked with manufacturers across apparel, automotive interiors, and furniture production. The pattern cutting automation systems we design integrate your digital patterns with high-performance hardware. The workflow becomes: design → digitize → nest → cut. No manual intervention between steps.
Understanding CAD Pattern Cutting Software and Digital Workflows
Your patterns need to live in digital form before any machine can cut them. That’s where CAD pattern cutting software enters the picture. CAD/CAM systems let you design patterns once, then use them infinitely without redrawing.
The software handles several critical tasks:
- Pattern creation and editing: Draw or import your pattern geometry into the CAD system
- Digital grading: Scale patterns up and down for different sizes automatically
- Nesting preparation: Arrange multiple patterns on fabric to minimize waste
- Machine communication: Export cutting instructions the hardware understands
Most modern CAD pattern cutting software works with your existing design workflow. If your team uses Adobe Illustrator or another design tool, the software imports those files. You’re not starting from scratch.
The real power comes when you connect CAD to your cutting machine. The software doesn’t just store your patterns, it talks directly to the hardware. You adjust a pattern in the CAD system, and the next cut reflects that change automatically.
One common mistake is treating CAD software as a replacement for design work. It’s not. CAD pattern cutting software is a translator. Your designers still create the patterns. The software makes those patterns machine-readable.
Selecting and Setting Up Automated Fabric Cutting Machines
Choosing the right cutting machine depends on three factors: your production volume, the materials you cut, and your precision requirements.
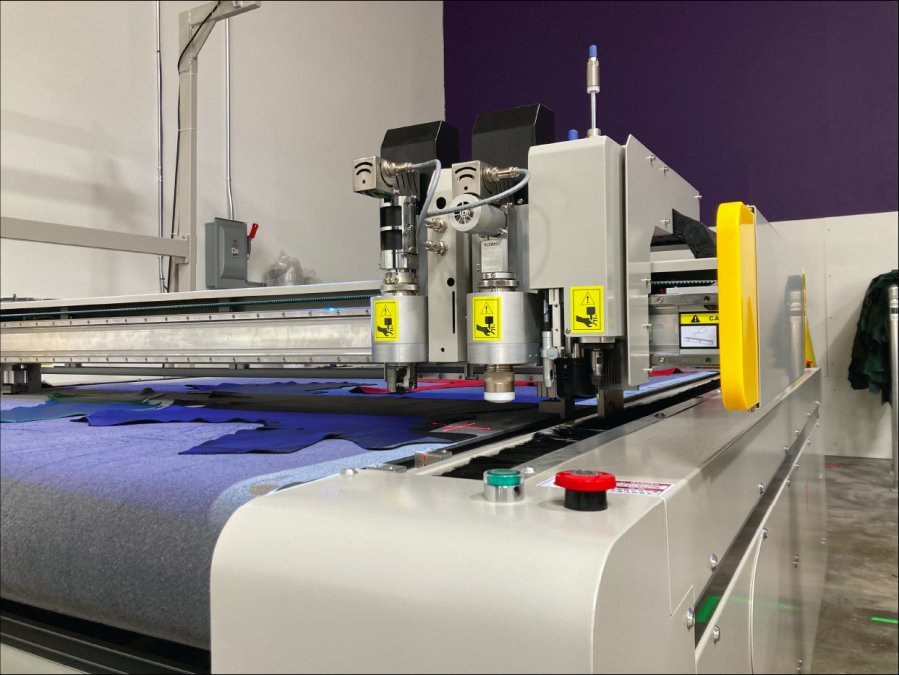
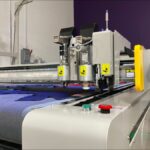
Automated fabric cutting machines come in several types. Knife cutting systems use a sharp blade that moves across the fabric. Laser cutters use focused light to burn through material. Water jet systems use pressurized water. Each has strengths and limitations.
For apparel and garment production, knife cutting dominates. It’s fast, handles most fabrics well, and costs less than laser or water jet systems. For technical textiles or composite materials, you might need something more specialized.
Material-Specific Configuration
Different materials demand different setup. Canvas cuts differently than silk. Leather has different properties than polyester. Your cutting system needs to adjust.
The key variables are:
- Blade sharpness and type: Dull blades tear fabric. Leather needs a different blade angle than woven textiles
- Cutting speed: Faster speeds work for stable materials. Delicate fabrics need slower speeds to prevent puckering
- Pressure settings: The downward force on the blade changes by material thickness and density
- Fabric stabilization: Some materials slip during cutting. Your system needs hold-down pressure or vacuum assistance
Before running full production, test your material with small batches. Cut a few pieces, inspect them, adjust settings, repeat. This takes time but prevents thousands of dollars in scrap.
Precision and Repeatability Standards
Precision means how close each cut comes to the target dimension. Repeatability means how consistent that precision is across hundreds of pieces.
Most modern automated cutting systems hold tolerances of ±0.5 millimeters or better. That’s tight enough for apparel. For automotive or aerospace components, you might need ±0.25 millimeters.
The real test is piece-to-piece consistency. Cut 100 identical pieces and measure them. If 95 pieces are perfect and 5 are off, your system has a repeatability problem. That problem might be:
- Blade wear (replace the blade more frequently)
- Fabric movement (improve your stabilization system)
- Software drift (recalibrate your machine’s positioning system)
- Material variation (some fabrics are simply inconsistent)
Document your tolerances clearly. Your team needs to know what “good” looks like before problems start.
Implementing Fabric Nesting Software to Reduce Waste
Fabric nesting software arranges your patterns on the fabric to minimize scrap. This is where pattern cutting automation saves real money.
Manual nesting is slow and leaves gaps. A skilled person might achieve 85% fabric use. Nesting software routinely hits 92-95% use. On a large production run, that difference is thousands of dollars in saved material.
The software works by:
- Taking your digital patterns
- Analyzing the fabric width and length available
- Automatically positioning patterns to minimize unused space
- Generating a cutting layout the machine can follow
The best nesting software learns from your patterns. If you cut the same styles repeatedly, the software remembers which nesting layouts worked well and suggests them again.
One caution: nesting software sometimes rotates patterns to fit them better. That’s fine for most garments, but if your fabric has a nap (like velvet) or a directional print, rotation breaks your product. The software needs to know about these constraints.
Building Your Automated Cutting Room Workflow
An automated cutting room isn’t just machines. It’s a system where patterns flow from design through to finished cut pieces.
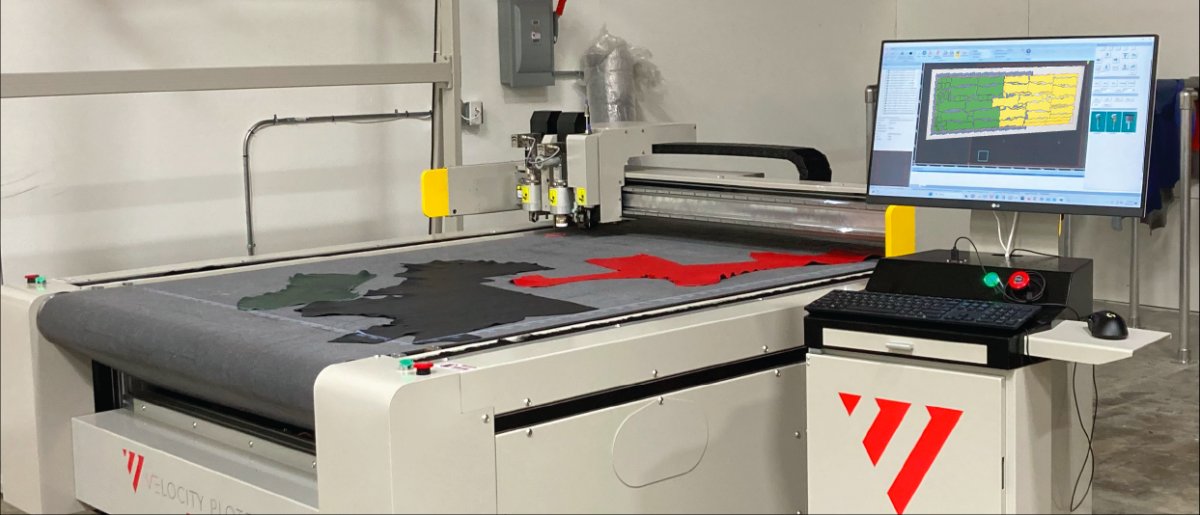
The workflow typically looks like this:
- Design phase: Your pattern makers create styles in your design system
- Digitization: Patterns are converted to CAD format if not already digital
- Nesting: Fabric nesting software arranges patterns on the material
- Lay planning: Your team spreads fabric and prepares it for cutting
- Cutting: The automated system cuts all pieces according to the nesting plan
- Sorting: Cut pieces are bundled by size and style for sewing
Each step needs clear handoff points. Who checks the nested layout before it goes to the machine? Who inspects cut pieces for quality? What happens when the machine encounters a problem?
Lay Planning and Marker Making
Lay planning is the process of spreading fabric on the cutting table. Marker making is creating the cutting guide that shows where each pattern goes.
In traditional cutting rooms, this was manual work. Someone would roll out fabric, mark pattern positions with chalk or tape, and manually cut around those marks. It was slow and error-prone.
With pattern cutting automation, marker making becomes digital. The nesting software creates a marker, a digital layout showing exactly where each pattern sits on the fabric. The cutting machine reads that marker and cuts automatically.
This eliminates the guesswork. Every lay is identical. Every cut follows the same path.
Lay planning still requires human decisions. How many layers of fabric do you stack? What’s the optimal fabric width to use? Should you split a large order across multiple lays to minimize waste? These are business decisions, not technical ones.
Integration with Factory Systems
Your cutting room doesn’t operate in isolation. It connects to your design system, your production scheduling system, and your inventory management.
Integration means:
- Design system connection: Patterns flow automatically from design to cutting without manual export/import steps
- Production scheduling: The cutting room knows which styles to cut and in what quantities based on production schedules
- Inventory tracking: Cut pieces are logged automatically so you know what’s been produced
- Quality data: Defects and waste are recorded for continuous improvement
This integration reduces manual data entry and catches problems early. If the cutting room is scheduled to cut pieces that don’t exist in the design system yet, that mismatch surfaces before fabric is wasted.
Measuring ROI and Operational Performance
The investment in pattern cutting automation is significant. You need to know if it’s paying off.
The key metrics are:
- Material use: What percentage of fabric becomes finished pieces? Track this before and after automation
- Throughput: How many pieces per hour can your system cut? Compare this to your previous manual process
- Labor hours: How many people does cutting require now versus before?
- Defect rate: What percentage of cut pieces meet quality standards?
- Cost per piece: Divide total cutting costs by pieces produced
Most manufacturers see material waste drop from 12-15% to 5-8% after implementing pattern cutting automation. That’s the biggest ROI driver. If you cut 100,000 garments per year and waste drops by 7%, you’ve saved significant fabric cost.
Labor savings are real but often smaller than expected. You still need operators to load fabric, monitor the machine, and handle exceptions. But you need fewer of them, and they’re more productive.
Calculate your payback period honestly. If your system costs $200,000 and saves $50,000 per year in material and labor, you break even in four years. That’s reasonable for industrial equipment.
Training Your Team and Managing the Transition
The biggest risk in automation isn’t technical. It’s people. Your cutting room team has done this work manually for years. Automation changes their jobs fundamentally.
Start training before the equipment arrives. Your team needs to understand:
- How the new workflow differs from the old one
- What their new responsibilities are
- How to troubleshoot common problems
- Safety procedures for the new equipment
Training should be hands-on. Don’t just lecture. Let people operate the software and machines under supervision. Mistakes in training are cheap. Mistakes in production are expensive.
Expect a learning curve. The first month of production will be slower than your projections. Your team is learning. The equipment is being dialed in. By month three, you should see the performance you expected.
Address concerns directly. If someone worries about job security, be honest. Automation reduces headcount in some roles, but it creates new ones. You need people who understand both the old process and the new one. Those people are valuable.
Common Implementation Mistakes to Avoid
Most manufacturers who struggle with pattern cutting automation hit the same problems. Knowing them in advance helps you avoid them.
Mistake 1: Underestimating the digitization effort. If your patterns exist only on paper or in hand-drawn sketches, converting them to digital format takes time. Budget for this.
Mistake 2: Skipping the nesting optimization phase. You can turn on the nesting software and use its default settings.
Mistake 3: Cutting before you’re ready. The urge to run production immediately is strong. Resist it. Spend time testing materials, dialing in settings, and validating quality.
Mistake 4: Not tracking the right metrics. You need data to know if automation is working. Set up measurement systems before you start.
Mistake 5: Treating the machine as a black box. Operators need to understand how the system works and why it makes decisions. If someone understands the logic, they can troubleshoot problems.
Pattern cutting automation is a significant investment, but the returns are measurable and real. Plotters Velocity helps manufacturers across apparel, automotive, and furniture production implement these systems.
Preguntas Frecuentes
How does advanced pattern cutting automation work in a factory?
Advanced pattern cutting automation integrates CAD software with high-precision cutting hardware to convert digital pattern designs into physical cuts on fabric or materials. The process begins with digitized patterns uploaded to CAD software, which calculates optimal fabric lay and nesting to minimize waste. The system then controls automated cutting machines to execute precise cuts at high speed and repeatability. This replaces manual cutting, reducing labor time, human error, and material waste significantly.
What’s the typical ROI timeline for pattern cutting automation equipment?
ROI depends on your current waste levels, production volume, and labor costs. Your specific timeline depends on production scale and material costs. Contact Velocity Plotters for a customized ROI analysis based on your current operation.
Can automated cutting systems handle different fabrics and materials?
Yes. Advanced systems support leather, canvas, technical textiles, composites, and specialty fabrics by adjusting cutting parameters such as blade pressure, speed, and feed rate for each material. Setup varies by material type and thickness, but modern CAD/CAM systems store profiles for rapid switching between materials. This flexibility allows a single system to serve diverse production needs without extensive reconfiguration, though initial material testing and parameter optimization is necessary.
How much training do operators and pattern makers need for automation software?
Most operators and pattern makers can become productive on CAD pattern cutting software within 2-4 weeks of hands-on training, depending on prior CAD experience. Pattern digitization and nesting optimization typically require 6-8 weeks to master fully. Velocity Plotters provides world-class technical support to accelerate adoption and minimize production disruption during transition.

 ES
ES  EN_US
EN_US