
Tabla de Contenidos
- Start With Business and Project Requirements
- Plotter Printer vs. Cutting Plotter: Which Type Fits Your Workflow
- Choosing an Industrial Cutting Plotter for Precision and Throughput
- How an Apparel Plotter Handles Fabric Pattern Plotting at Scale
- Plotter Software for Garment Production: Workflow and File Compatibility
- Total Cost of Ownership and Lifecycle Planning for an Industrial Plotter
- Evaluating Used and Refurbished Industrial Plotters
- Preguntas Frecuentes
Last Updated: October 16, 2026
Start With Business and Project Requirements
An industrial plotter is a computer-controlled machine that draws, scribes, or cuts patterns and markers from digital files at production scale.
At Velocity Plotters, we see buyers jump straight to machine comparisons and regret it later. The requirements document comes first: materials, units per shift, and peak season.
Map Production Volume and Duty Cycle
Duty cycle is the share of a shift a machine runs under load, and it decides whether a light-duty unit survives your floor.
Start by logging a typical production week:
- Units cut per shift, on your busiest day
- Average marker length and layer height
- Hours the machine runs versus sits idle
If peak weeks run the machine near-continuously, plan for a machine rated for that load. Under-specifying to save on purchase price usually shows up as downtime during your busiest month.
Match the Machine to Your Intended Application
Intended application narrows the field faster than any spec sheet. Apparel, automotive interiors, furniture, and composites each stress a plotter differently.
A few rules of thumb from working with production teams:
- Apparel and sewn products: prioritize fabric pattern plotting and cutting accuracy on layered material
- Automotive interiors: prioritize precision on leather and technical textiles
- Furniture and upholstery: prioritize design-to-production workflow integration
Write your application down in one sentence. If a vendor’s machine can’t clearly serve that sentence, move on. It’s the most useful filter in the process, and most buyers skip it.
Plotter Printer vs. Cutting Plotter: Which Type Fits Your Workflow
A plotter printer produces printed output such as markers, templates, or proofs, while a cutting plotter physically cuts material to shape. Many production floors need one, some need both, and a few need them combined in a print-and-cut workflow.
The distinction matters because it changes your downstream process: a printer feeds a cutting or print room, while a cutter feeds assembly.
|
Machine Type |
Primary Output |
Typical Use |
Best For |
|---|---|---|---|
|
Plotter printer |
Printed markers, templates, proofs |
Pattern documentation, nesting checks |
Design and pattern-making teams |
|
Cutting plotter |
Cut parts from roll or sheet media |
Production cutting of fabric, leather, textiles |
Cutting rooms running daily volume |
|
Print-and-cut |
Printed then cut in one workflow |
Labels, technical graphics, mixed jobs |
Shops needing both in one pass |
Choosing an Industrial Cutting Plotter for Precision and Throughput
An industrial cutting plotter is judged on two numbers: how accurately it cuts and how much it cuts per hour. Precision without throughput starves your assembly line; throughput without precision creates rework.
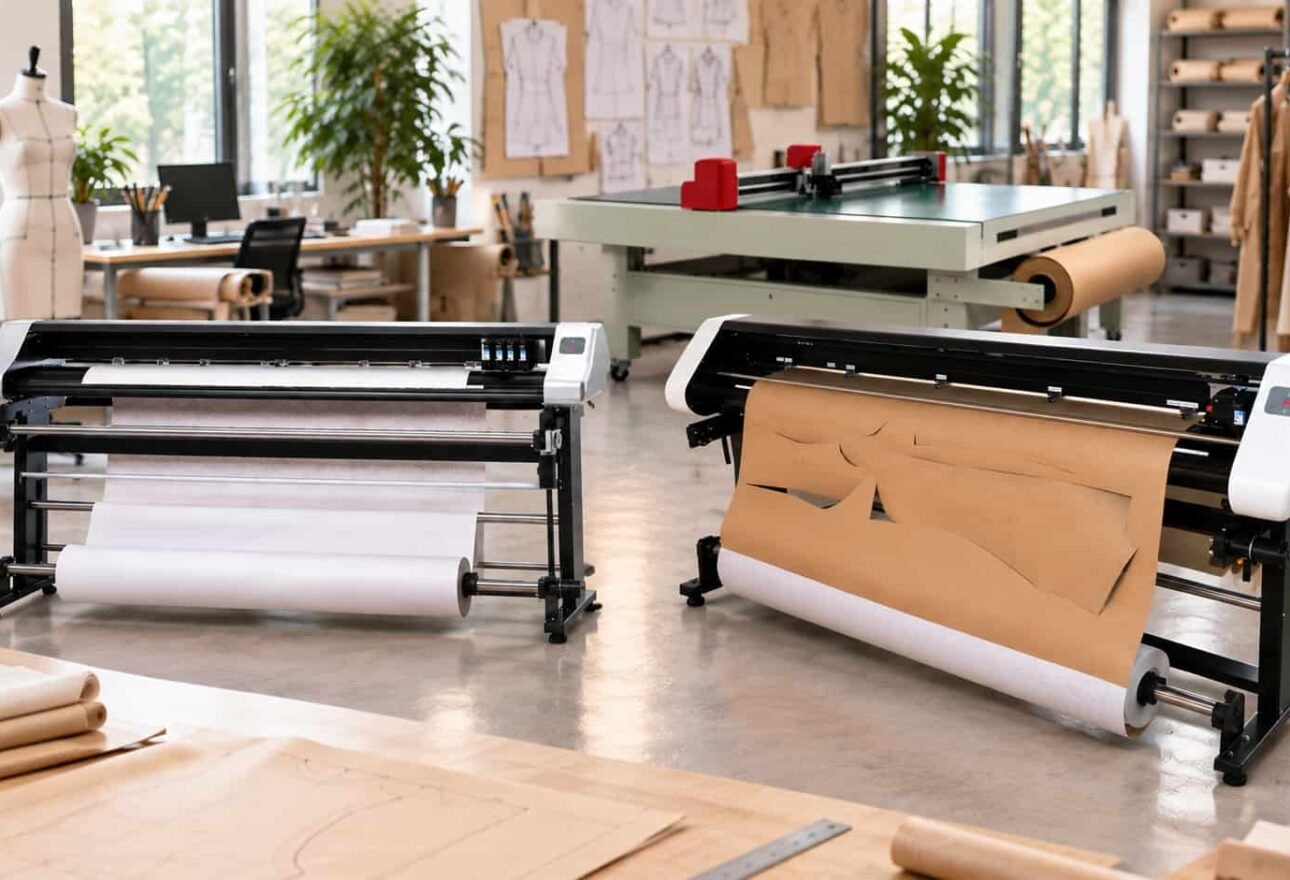
Cutting accuracy and line accuracy determine whether parts fit together on the first pass. Resolution affects how fine a detail the machine can reproduce.
Print Quality, Cutting Accuracy, and Resolution Benchmarks
Benchmark against your own worst-case job, not the vendor’s best-case demo. Bring a file that has given your current setup trouble: tight curves, small notches, or a material that shifts.
What to test and record:
- Line accuracy on a tight-radius pattern
- Consistency across the full working width
- Edge quality on your most difficult material
If a machine handles your hardest job well, everyday work is easy. If it only handles simple shapes, you’ve learned something useful before signing.
How an Apparel Plotter Handles Fabric Pattern Plotting at Scale
An apparel plotter is built for the specific demands of garment production: long markers, layered fabric, and patterns that must match across sizes.
The difference shows up in material handling. Fabric stretches, shifts, and behaves differently depending on weave and weight. A machine tuned for apparel accounts for that; one tuned for rigid media does not.
Matching Fabric Pattern Plotting to Material Type
Material compatibility is where most buying mistakes hide. Leather, canvas, and technical fabrics each need different handling, and a machine that excels on one may struggle on another.
Build a material matrix before you buy:
- List every material you cut today
- Add materials you expect to cut in two years
- Note which are roll media and which are sheet media
If your list is long and varied, prioritize machines with broad media compatibility over machines optimized for a single material. Versatility costs less than a second machine.
Plotter Software for Garment Production: Workflow and File Compatibility
Plotter software for garment production turns a design file into machine instructions, and it decides how much manual work sits between your CAD system and the cutting bed.
Check file format support first. Your design team works in specific formats, and every conversion step is a place for errors.
Then evaluate the workflow itself:
- How many steps from design file to cut file
- Whether nesting and marker making happen in the same tool
- How the software handles revisions and re-cuts
Ease of use matters more than feature count here. A tool your operators can run confidently beats a more capable one they avoid.
Total Cost of Ownership and Lifecycle Planning for an Industrial Plotter
Purchase price is the smallest number in the real cost of an industrial plotter. Total cost of ownership over the equipment lifecycle includes consumables, ink, maintenance, downtime, and labor. A machine that costs more upfront but consumes less material and needs fewer service calls can be the cheaper machine over five years.
Build a Five-Year Cost Model, Not a Price Comparison
A cost model turns a spec sheet into a decision. Build it in a spreadsheet with one column per candidate machine and one row per cost category, then extend each row across the expected service life. Most shops plan on a five-year horizon; heavy-duty industrial units are often modeled at seven to ten years because the frame, gantry, and drive system outlast the consumables.
The categories that belong in the model:
- Acquisition: purchase price, delivery, rigging, and installation labor
- Consumables: blades, cutting mats, pens, and replacement parts, priced per unit of output rather than per month
- Ink or toner: only for print-capable machines, estimated from your actual coverage per job
Convert Consumables Into Cost Per Unit
Vendors quote consumable prices per blade, per mat, or per cartridge. That number is useless until you divide it by the output it produces.
The same logic applies to ink. A print-capable plotter’s ink cost depends on coverage, so estimate it from a representative job rather than a marketing yield figure.
Price Downtime as a Real Line Item
Downtime is the cost category buyers most often leave out, and on an industrial floor it is usually the largest.
Two machines with the same purchase price can have very different downtime profiles. A machine with a local service technician and stocked parts might lose four hours per incident; one with parts shipped from overseas might lose four days.
Reliability, Lifespan, and Support as Cost Lines
Ask each vendor for mean time between failures, the recommended service interval, and the expected service life of the frame, drive system, and cutting head.
Technical support quality belongs in the model too. Ask about response time commitments, whether support is in-house or outsourced, and whether remote diagnostics are included.
Scalability Decides the Horizon
If your production volume grows, can the machine grow with it, or does growth mean replacement? Look for expandable working widths, upgradeable cutting heads, and software that scales to more users or nesting complexity. For most shops, the answer decides whether this is a five-year purchase or a two-year one, and that single question can outweigh every other line in the model.
Installation, Facility, and Operator Requirements
Installation planning is where projects slip. Footprint, power, floor loading, and material storage all need to be settled before the machine arrives, not after. Confirm before you order:
- Footprint and clearance around the machine, including space for material infeed and outfeed
- Power supply voltage, phase, and amperage, plus any compressed air or ventilation needs
- Floor loading for the machine’s weight, especially on upper floors or in older buildings
Operators need more than a manual. Plan for training time, a learning period, and a named person responsible for the machine. A plotter with no trained owner becomes an expensive table.
Evaluating Used and Refurbished Industrial Plotters
Second-hand equipment can stretch a budget, but the risk sits in the details. A used industrial plotter is worth buying when you can verify its service history, remaining support life, and condition under load. The gap between a good used machine and a bad one is almost never visible in photos, it shows up in the service records, the test cut, and the parts pipeline.
Know What You Are Actually Buying
The market has three tiers, and they carry different risk:
- Dealer refurbished: the machine has been torn down, worn parts replaced, and usually comes with a limited warranty. Highest price, lowest risk.
- Dealer as-is: inspected and cleaned but not rebuilt, sold without a meaningful warranty. Middle price, middle risk.
- Private sale: no warranty, no recourse, and often no service records. Lowest price, highest risk.
A refurbished machine from a reputable source with a warranty carries less risk than a private sale. Either way, budget for immediate maintenance and possible part replacement. The purchase price is not the cost of getting it running.
Inspect the Machine, Not the Listing
Bring a flashlight and a straightedge, and run through a physical inspection before you discuss price:
- Frame and gantry: look for cracks, welds, or bends that suggest a crash or a drop
- Rails and bearings: run a finger along the rail. Scoring, pitting, or a gritty feel means wear that will show up as accuracy drift
- Belts and drive system: check tension and look for glazing, fraying, or missing teeth
Verify Service History and Support Life
Ask for the serial number and call the manufacturer or authorized service provider directly. Confirm the model’s production dates, whether it is still supported, and whether parts are stocked domestically or shipped from overseas.
Request the service records and read them for patterns. A single major repair with documentation is normal.
Run a Test Cut on Your Own Material
Never buy on the seller’s sample. Bring a file that stresses the machine: tight radii, small notches, and a material that shifts or stretches.
What to record during the test:
- Line accuracy on the tightest radius in your file
- Consistency from one edge of the working width to the other
- Edge quality on your most difficult material
If the seller will not allow a test run on your material, treat that as a data point about the machine and the seller.
Price the Risk Into Your Offer
Used equipment pricing should reflect the remaining life of the wear parts. Ask what a full set of blades, mats, belts, and a cutting head or printhead costs new, then subtract the expected remaining life from your offer.
Factor in transport and rigging as well. A wide-format industrial plotter is heavy and awkward to move, and a rigging crew is a real line item.
Match the Used Machine to Your Requirements Document
Run the used machine through the same requirements document you built for new equipment. If it cannot serve your application sentence, your material matrix, and your throughput target, the discount is irrelevant. A cheap machine that cannot do the work is more expensive than the right machine at full price.
Preguntas Frecuentes
What should I look for when choosing an industrial plotter?
Focus on five things: your production volume and required duty cycle, the materials you cut most often, working width and media size, software and file-format compatibility, and total cost of ownership across the machine’s lifespan. A plotter that fits your daily throughput and media mix will outperform a cheaper unit that bottlenecks your line. Request a live test on your own fabric before committing.
What is the difference between a plotter printer and a cutting plotter?
A plotter printer produces large-format output such as markers or patterns on paper, while a cutting plotter physically cuts fabric, leather, or technical textiles. Many industrial setups combine both in a print-and-cut workflow: the printer creates the marker, and the cutting plotter executes the cut. Your intended application determines which type or combination you need.
How do I match an industrial plotter to my materials and production volume?
List every material you cut, including leather, canvas, and technical fabrics, and note thickness and roll width. Then calculate peak daily output and add a safety margin so the machine runs below its maximum duty cycle. Confirm media compatibility for each material and test throughput on your heaviest fabric before purchase.
Which software features matter when selecting an industrial plotter?
Look for plotter software for garment production that imports common CAD file formats, integrates with your existing design tools, and supports nesting or marker optimization. Workflow compatibility matters as much as hardware: if the software adds manual steps, you lose the efficiency gains. Ask for a workflow demo using your own files.
How can an industrial plotter reduce material waste?
Nesting and marker optimization software arranges patterns to use more of each roll, and precise cutting accuracy reduces rework from misaligned pieces. Combined, these reduce offcut waste compared with manual cutting. Actual savings depend on your pattern mix and current waste rate, so measure your baseline before and after installation.
What should I test before buying an industrial plotter?
Run a live test on your own materials at production speed. Check cut accuracy on curves and corners, verify registration if you run a print-and-cut workflow, and time a realistic batch. Ask about installation footprint, operator training, warranty terms, parts availability, and response time for service calls during a production run.

 ES
ES  EN_US
EN_US