
Table of Contents
- 1. The Real Cost of Staying on Paper
- 2. Digital Pattern Making Software: Choosing the Right Platform
- 3. Paper Pattern Digitizing: Preserving Accuracy and Fit
- 4. Pattern Making CAD Training: The Learning Curve
- 5. Building a Digital Pattern Cutting Workflow from Scratch
- 6. Team Adoption and Resistance to Change
- 7. Measuring ROI and Transition Success
- Conclusion
- Frequently Asked Questions
Last Updated: October 16, 2026
1. The Real Cost of Staying on Paper
Most cutting rooms don’t switch to digital pattern cutting because paper still works. That’s the trap.
Paper pattern drafting feels safe, you can touch it, tape it, fix it with a pencil.
Digital pattern cutting is the process of creating, editing, and preparing garment patterns in CAD software, then sending those files directly to a plotter or cutting machine.
At Velocity Plotters, we talk to cutting rooms every week stuck between these two worlds. They know digital is faster, and that the switch isn’t free.
2. Digital Pattern Making Software: Choosing the Right Platform
The first challenge is picking software you won’t outgrow in a year. Digital pattern making software ranges from simple drafting tools to full production systems handling grading, marking, and nesting.
Most packages fall into three rough tiers:
- Drafting-only tools handle pattern creation and basic editing. They’re cheap and fast to learn, but grading, marker making, and plotter output often live in a separate program.
- Pattern-and-grade systems add rule-based grading, seam allowance libraries, and notches. This is where most small production shops land.
- Full production suites bundle grading, marker nesting, cut-file generation, and integration with spreaders and cutters. They cost the most and take the longest to implement, but they remove the manual handoffs between steps.
A common mistake is choosing on price alone. A tool that can’t export standard pattern files locks you into one vendor’s hardware later. Switching mid-project, re-digitizing patterns, retraining staff, rebuilding grading rules, usually dwarfs the license savings.
The software decision is really a workflow decision. Ask these questions before you commit:
- Can it import and export DXF or ASTM pattern files?
- Does it handle grading across your full size range with rule-based changes, not manual redraws?
- Can it output directly to your plotter without a conversion step?
- Does it support the materials you cut, from leather to technical textiles?
Hardware, File Formats, and Compatibility
Your software is only as good as the hardware it talks to. A plotter that can’t read your file format turns a digital workflow back into a manual one, silently.
Three pieces of hardware matter in a digital pattern workflow:
- A digitizer converts existing paper patterns into vector files. Flatbed and large-format scanners are common; some shops use a digitizing tablet. Resolution and calibration determine whether curves come through clean or jagged.
- A plotter prints patterns at full scale, usually on paper or marker paper. Plotter width determines whether you can print a full pattern piece in one pass or have to tile it.
- A cutter reads a cut file and cuts fabric or marker paper directly. Not every shop needs one at the start, but the software you choose should be able to produce a cut file if you plan to add one later.
Check compatibility before you buy anything. ASTM D6673 and related ASTM committee standards describe how pattern data should be structured, and the ASTM Committee on textile standards publishes the specifications many pattern files follow.
Plan for three things: file format support, plotter width, and network access. If your cutting room is separate from your design office, file transfer must be simple and reliable.
3. Paper Pattern Digitizing: Preserving Accuracy and Fit
Paper pattern digitizing is the step most teams underestimate. You can’t just scan a paper pattern and expect a perfect digital copy.
Scanned patterns pick up distortion from folds, tape, and uneven lighting. A pattern that fit well on paper can come out slightly wrong once digitized.
The fix is to digitize with a reference grid and verify key measurements against the original. Check these points before you trust a digitized pattern:
- Grain lines and notches line up with the original
- Seam allowances are consistent across all pieces
- Grading points match your size chart
- Curves are smooth, not jagged from a low-resolution scan
Quality Checks Before Fabric Cutting
Never cut fabric from an unverified digital pattern. Run a test garment first.
A test garment in cheap fabric costs far less than a production run cut from a flawed file, and it catches fit issues before they reach the cutting table. If it fits, you’ve validated the file; if not, you’ve saved a roll of material.
4. Pattern Making CAD Training: The Learning Curve
Pattern making CAD training is where most transitions slow down. Experienced patternmakers already understand fit, grading, and construction. The challenge isn’t the craft.
Expect a real learning curve, but a shorter one than you’d think.
A common mistake is training everyone at once. Start with one or two people who can become your in-house experts, then let them teach the rest.
Adapting Existing Skills to Digital Workflows
Your paper skills transfer more than you’d expect. Understanding seam allowance, notches, and grain lines is the hard part, and your team already has it.
What changes is the mechanics: instead of a pencil and ruler, a mouse and keyboard; instead of redrawing a size, you adjust a grading rule once and let the software do the rest.
The real difference is reuse. A digital pattern can be copied, adjusted, and re-graded in minutes; a paper pattern has to be redrawn from scratch.
5. Building a Digital Pattern Cutting Workflow from Scratch
A digital pattern cutting workflow connects design, drafting, plotting, and cutting into one chain. Build it in stages so you can fix problems before they pile up.
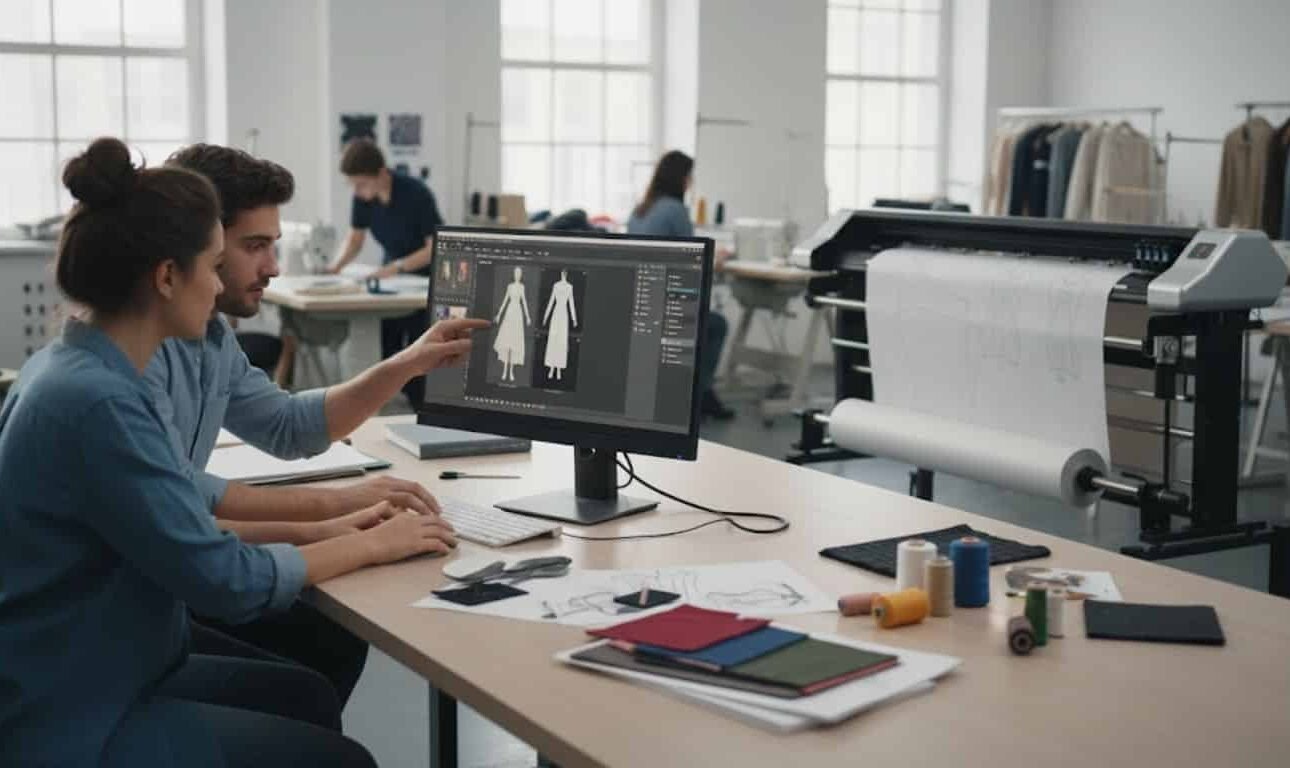
Start with a migration plan. Here’s a practical sequence that works for most shops:
- Digitize your core patterns first. Start with your best-selling, simplest styles.
- Standardize file naming and storage. Every pattern needs a version number and a clear owner.
- Set up your plotter and test print. Confirm scale and tiling before production.
- Run a pilot style end to end. Take one garment from digital file to finished piece.
- Document the new steps. Write down what changed so new hires can follow it.
From Screen to Physical Production
The final step is moving from a digital file to a physical pattern. Large patterns often need to be printed on multiple sheets and tiled together.
Accuracy here matters. A pattern printed at the wrong scale will produce a garment that doesn’t fit, no matter how good the file is. Always print a calibration test first and measure it against a known length.
For teams scaling up, Velocity Plotters builds plotters and cutting systems that read common pattern formats and output at production scale.
6. Team Adoption and Resistance to Change
Resistance to change is the challenge nobody puts in the project plan. Your most experienced patternmaker may be the most reluctant to switch.
That resistance usually isn’t about the technology. It’s about losing control of a skill they’ve spent years mastering. Address it directly.
What works:
- Let skeptics test the software on a real project, not a demo
- Show how their expertise still matters in the new workflow
- Pair a fast learner with a reluctant one
- Celebrate the first digital pattern that saves real time
What doesn’t work is mandating the switch without support. Teams that feel forced tend to quietly keep using paper on the side.
7. Measuring ROI and Transition Success
Measuring transition success means tracking more than time saved.
Start by building a simple cost picture. You don’t need exact figures, you need the categories, so you can fill them in with your own numbers:
- Software licenses, per-seat annual or perpetual, plus any modules for grading, nesting, or cut-file output.
- Hardware, digitizer, plotter, and optionally a cutter, plus consumables like plotter paper and blades.
- Training time, the hours your patternmakers spend learning instead of producing, valued at their loaded hourly rate.
- Productivity dip, the first weeks or months when the team is slower on digital than they were on paper.
- Migration labor, the time to digitize existing patterns, verify them, and rebuild grading rules.
On the return side, the gains come from four places:
- Fabric savings from tighter markers and fewer cutting errors.
- Time savings from rule-based grading instead of redrawing each size.
- Rework reduction from catching fit and scale problems before fabric is cut.
- Reuse, new styles that start from an existing block instead of a blank sheet.
Track these numbers before and after the switch:
|
Metric |
Why It Matters |
What to Watch |
|---|---|---|
|
Fabric waste per style |
Shows material savings |
Compare cut yield before and after |
|
Pattern revision time |
Shows workflow speed |
Time from change request to new file |
|
Cutting errors per run |
Shows accuracy gains |
Count misfires and recuts |
|
Training hours per person |
Shows adoption cost |
Track until team is at full speed |
|
Cost per graded size |
Shows grading efficiency |
Compare manual redraw time to rule-based output |
|
Time to first approved sample |
Shows end-to-end speed |
Measure from design handoff to approved fit |
A common mistake is expecting instant results. The first month is usually slower, not faster; gains show up once the team stops fighting the software.
Payback logic is simpler than it looks. If your annual software and hardware cost is less than your fabric and rework savings plus recovered patternmaker hours, the switch pays for itself.
Conclusion
The challenges of switching to digital pattern cutting are real: software choices, digitizing accuracy, training time, and team resistance.
Velocity Plotters builds the hardware and software side of that transition. Our systems combine high-performance plotters with intelligent cutting tools that reduce material waste and improve pattern accuracy.
Get started with Velocity Plotters and move your cutting room from paper to a digital workflow built to scale.
Frequently Asked Questions
What are the biggest challenges when switching to digital pattern cutting?
The main hurdles are training time, file management, and getting the team on board. Patternmakers who have drafted by hand for years need weeks or months to adjust to digital pattern cutting software. You also have to digitize existing paper patterns accurately, set up a reliable file naming system, and validate digital patterns with test garments before committing to fabric cutting. Planning each of these steps in advance reduces disruption to production.
How long does it take to learn digital pattern-making software?
Most patternmakers with solid drafting skills reach basic proficiency in two to four weeks of focused training. Reaching the speed and confidence of paper drafting usually takes two to three months of daily use. Complex garment construction, grading, and pattern alterations take longer to master. Pairing structured pattern making CAD training with real production projects speeds up the process considerably compared to classroom-only learning.
How do you transition from paper patterns to digital pattern making?
Start by digitizing your most-used patterns so the team works with familiar blocks. Run digital and paper versions in parallel for a few styles, comparing fit and accuracy. Set up a clear file management structure with version control from day one. Once the team is comfortable, move new pattern development fully into the software while keeping paper as a reference during the transition period.
Is digital pattern making more expensive than manual pattern making?
The upfront investment in software, a plotter, and training is higher than paper and pencils. Over time, digital pattern cutting usually costs less per style because pattern reuse, grading, and revisions take far less labor. Material waste also drops when nesting is done in software. Pricing for hardware and software varies by configuration, so request a quote based on your production volume and material types.


 EN_US
EN_US  ES
ES