
Table of Contents
- Why Manufacturers Are Seeking an AOLCNC Alternative for Leather Cutting
- Digital vs Manual Pattern Cutting Efficiency: What Changes on the Floor
- Drag Knife vs Oscillating Knife: Matching the Tool to the Hide
- How Automated Leather Nesting Software Reduces Material Waste
- What to Look For in the Best CNC Machine for Leather Goods
- Total Cost of Ownership: Beyond the Purchase Price
- Tooling Compatibility and Workflow Integration for Non-CNC Teams
- Frequently Asked Questions
Last Updated: September 18, 2026
Why Manufacturers Are Seeking an AOLCNC Alternative for Leather Cutting
Production managers searching for an AOLCNC alternative for leather cutting share one complaint: the machine works, but the workflow around it does not. This guide from Velocity Plotters covers what matters when evaluating a replacement, from knife selection to material yield. Leather cutting separates pattern pieces from a hide or synthetic sheet using a blade, die, laser, or digital cutting table, and the method decides your waste rate, labor cost, and how fast you turn a CAD file into cut parts.
Digital vs Manual Pattern Cutting Efficiency: What Changes on the Floor
Digital pattern cutting replaces hand tracing and shears with a CAD file, a nesting engine, and a computer-controlled blade. The difference shows up in speed, consistency, and hide utilization.
Throughput and Labor Comparison
A digital cutting table runs a full nest unattended once loaded. Manual cutting ties up one skilled person per table for the entire job. On repetitive work, that gap compounds fast.
|
Factor |
Manual Cutting |
Digital Cutting Table |
|---|---|---|
|
Operator attention |
Constant, per table |
Load, then monitor |
|
Pattern consistency |
Varies by cutter |
Repeatable from CAD |
|
Nesting accuracy |
Limited by eye |
Software-optimized |
|
Rework rate |
Higher on complex parts |
Low on verified files |
|
Scaling output |
Hire more cutters |
Add shifts on same table |
Where Manual Cutting Still Makes Sense
Manual cutting still holds up for one-off prototypes, very small runs, materials a blade handles poorly, and patterns that change so often programming time outweighs cutting time.
Drag Knife vs Oscillating Knife: Matching the Tool to the Hide
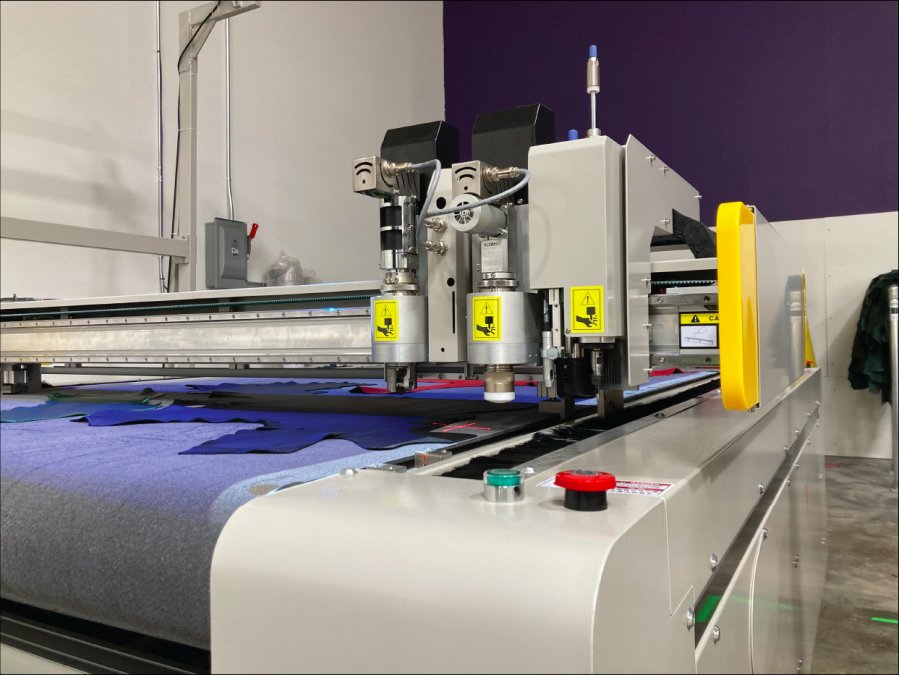
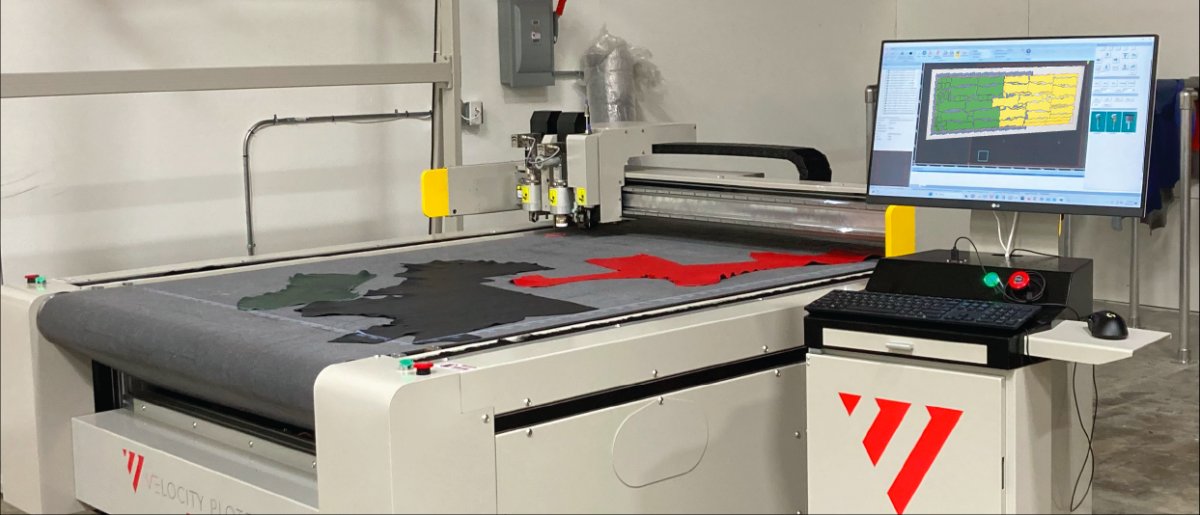
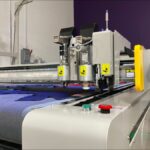
The tool head matters more than the machine brand. A drag knife is a freely rotating blade pulled through the material by the gantry. An oscillating knife drives the blade up and down at high frequency, cutting dense or thick material without dragging it out of position. A tangential knife rotates the blade under motor control so the edge stays aligned to the path, the difference shows on tight corners and small radii where a drag knife can lag or tear.
Tooling Compatibility Guide: Blade to Leather Type
Most buying guides stop at “drag for soft, oscillating for thick,” which is not enough to spec a machine. The table below is the practical mapping cutting-room leads use to build a tool library. Thickness is in millimeters and ounces (oz) because leather suppliers quote both.
|
Leather / Material |
Typical Thickness |
Recommended Tool |
Blade Notes |
|---|---|---|---|
|
Garment and lining leather |
0.4-0.8 mm (1-2 oz) |
Drag knife |
45° or 30° blade, low down-force, single pass |
|
Upholstery leather (full-grain) |
1.0-1.6 mm (3-4 oz) |
Oscillating knife |
Straight or wave blade, 2-3 mm oscillation stroke |
|
Automotive and heavy upholstery |
1.6-2.5 mm (4-6 oz) |
Oscillating knife |
Wave or scalloped blade, higher oscillation frequency |
|
Bonded / reconstituted leather |
0.8-1.5 mm |
Drag or oscillating |
Drag for thin sheets, oscillating if backing is dense |
|
Synthetic (PU, PVC, microfiber) |
0.5-1.5 mm |
Drag knife |
Sharp 45° blade; watch for heat buildup on PVC |
|
Multi-layer stacks (2-5 plies) |
Varies |
Oscillating knife |
Wave blade, reduced speed, compression foot required |
Cut Depth, Force, and the Settings That Decide Edge Quality
Blade oscillation frequency and cutting force decide edge finish. Too much force on soft leather stretches the grain; too little on dense material causes skipped cuts and hand trimming. Depth control and tool calibration are the two settings worth checking on every new material.
A workable starting point for calibration:
- Set cut depth to roughly 0.1-0.2 mm past the material thickness so the blade severs fully without scoring the mat.
- Start down-force low and increase in small steps until the cut separates cleanly with no fiber bridging.
- On genuine leather, cut with the grain direction the nesting engine assigned, cross-grain cuts on full-grain hides can lift the top layer.
- Recalibrate after every blade change; blade length varies between batches.
When a Drag Knife Beats an Oscillating Knife (and Vice Versa)
- Drag knife wins: thin, soft, or single-layer material where a clean edge matters more than force; low-power machines; jobs where blade cost per cut dominates consumables.
- Oscillating knife wins: dense, thick, or multi-layer stacks that resist a passive blade; full-grain upholstery where a drag knife would stretch the grain; production runs where cut speed on heavy material matters.
- Tangential control wins: tight corners, small radii, and sharp internal angles where blade alignment decides whether the corner is crisp or rounded.
For shops running mixed materials, a multi-tool head carrying a drag knife and an oscillating knife on the same gantry removes changeover time that eats into throughput.
How Automated Leather Nesting Software Reduces Material Waste
Automated leather nesting software arranges pattern pieces on a digital hide map to maximize yield while respecting grain direction and defect zones. It is the biggest lever on cost per unit, because hide defects and grain constraints make leather nesting harder than fabric nesting.
Hide Defects, Grain Direction, and Pattern Matching
A skilled manual nester accounts for holes, scars, and stretch zones by eye; software does it faster and more consistently. The workflow:
- Scan or import the hide and mark defect zones
- Set grain direction and stretch constraints per pattern piece
- Run the nesting engine to place pieces around defects
- Review yield percentage and adjust piece priority
- Export the cut file with tool paths and layer assignments
What to Look For in the Best CNC Machine for Leather Goods
The best CNC machine for leather goods is the one whose work envelope, tool head, and software match your production mix, not the largest spec sheet. Start with the material and part size, then work backward to the machine.
Small Shop vs Industrial Scale: Sizing the Work Envelope
Work envelope is the usable cutting area. Oversizing wastes floor space and money; undersizing forces you to split patterns across multiple cuts.
- Small shop: single-hide or half-hide envelope, one tool head, manual or light auto-loading
- Mid-size: full-hide envelope, multi-tool head for switching between drag and oscillating blades
- Industrial: conveyor system for continuous feed, automated loading, and inline defect scanning
Total Cost of Ownership: Beyond the Purchase Price
Total cost of ownership for a leather cutting system includes the machine, software licenses, consumables, floor space, training time, and downtime. Purchase price is often the smallest number over a five-year window.
Break the cost into four buckets:
|
Cost Category |
What to Include |
How to Estimate It |
|---|---|---|
|
Acquisition |
Machine, table, vacuum pump, installation |
Vendor quote |
|
Software |
Nesting license, CAD/CAM seats, updates |
Annual subscription |
|
Consumables |
Blades, cutting mats, vacuum filters |
Cost per cut, tracked monthly |
|
Operational |
Labor, training, downtime, support response |
Hours per week x rate |
Tooling Compatibility and Workflow Integration for Non-CNC Teams
Tooling compatibility decides how fast your team adopts the system. If your existing CAD files, blade holders, and material handling setup do not carry over, you are paying for a migration, not just a machine. For a shop moving off hand cutting or a legacy AOLCNC-style table, the question is not “does the machine work” but “how many of our current patterns, files, and habits survive the move.”
File and Format Compatibility
Before you commit, confirm what your nesting engine and cutter actually read. Common formats in leather work are DXF, DWG, PDF, and PLT, plus native files from pattern software such as Gerber, Lectra, or Optitex. Two failure modes recur:
- Unit mismatch. A DXF drawn in inches imported as millimeters produces a pattern 25.4x too large. Confirm the import dialog’s unit setting on the first file, then save it as a template.
- Open or duplicate contours. Hand-traced patterns often contain unclosed paths and overlapping lines. A cutter will lift the blade at every gap, which turns a clean cut into a series of plunge cuts and ruins edge quality.
Migrating Manual Patterns to Digital Files
Most small shops do not start with clean CAD, they start with paper patterns, cardboard templates, or both. The practical migration path:
- Digitize one proven pattern first, scan or trace it into CAD, then clean the contours.
- Cut that pattern on scrap material and compare it against the paper original before touching production leather.
- Adjust the nesting constraints (grain direction, stretch, defect zones) for that pattern, then save it as a template.
- Repeat for the next pattern, reusing the template’s constraints.
A Rollout Checklist for Teams New to CNC
- Confirm your CAD/CAM software exports a format the nesting engine reads, and verify units on the first import
- Test one production pattern end to end before committing to a full run
- Train one operator as the internal lead, then spread the workflow
- Set a blade calibration routine for each new material and save it as a preset
- Track yield percentage weekly for the first quarter
- Keep a manual fallback for one-off prototypes and materials the blade handles poorly
Most adoption problems come from skipping step two. Running one real pattern through the full pipeline exposes file errors, tool mismatches, and nesting constraints before they hit a live order.
Where the Barrier to Entry Actually Sits
The hardware is rarely the obstacle, the workflow change is. Operators who have cut by hand for years need a reason to trust the machine’s nesting and blade settings. Two practices shorten that curve. First, run the digital cut and a manual cut side by side on the same pattern for the first few jobs, so the team sees the yield and edge-quality difference directly.
Frequently Asked Questions
What is the best cutting tool for cutting leather on a CNC system?
It depends on the material and pattern. A drag knife suits thin, consistent synthetic leather and light garment hides because it slices cleanly with minimal force. An oscillating knife handles thicker genuine leather, upholstery hides, and dense technical textiles where a static blade would drag or distort the edge. Many production floors run a multi-tool head so one machine switches between both without a full changeover, keeping throughput steady across mixed orders.
How does automated leather nesting software reduce material waste?
Nesting software arranges pattern pieces across the hide outline to use as much surface area as possible, accounting for grain direction, stretch, and known hide defects. On genuine leather, where irregular shapes and flaws force manual cutters to leave large offcuts, tight digital nesting can lift material yield noticeably. The software also stores the nest so repeat orders cut identically, which keeps waste predictable instead of variable.
Can a digital cutter handle both genuine and synthetic leather?
Yes, with the right tooling and depth control. Genuine leather varies in thickness and density across a single hide, so the machine needs active depth control and tangential blade orientation to avoid tearing. Synthetic leather and coated fabrics are more uniform and cut faster. A system with adjustable blade oscillation frequency and cutting force lets you run both material types on the same table by switching profiles rather than swapping hardware.
What maintenance does a leather-cutting CNC system need to stay accurate?
Plan on routine tool calibration, blade replacement based on cut distance rather than calendar time, and cleaning of the vacuum table surface so hides sit flat. Check the conveyor or belt tension and the multi-tool head alignment regularly, since small drift shows up as inconsistent edge finish. Keeping a maintenance log tied to production hours helps you catch wear before it affects a live run and protects tool longevity.

 EN_US
EN_US  ES
ES